- Which site type is right for you
- Start Your Free Trial Now!
- Create an Online Business that Reflects Who You Are
- Introducing Start Editing Your Site: Your Theme, Now Available!
- Personalized Photos For Custom Graphics (Image)
- Add Your Own Text
- Add New Sections
- Add Pages
- Site Settings
- Advanced
- Connect a Custom Domain
- Preview and Publish Your Site
- Promote Your Website
- Final Thoughts
If you’re thinking about creating your own website, GoDaddy is a great place to start. Not only do they offer affordable hosting and domain services, but they also have a wide variety of templates and tools to help you get started. In this article, we talk about how to host website on GoDaddy.
To create your website on GoDaddy, you first need to choose what type of website you want. You can choose from a variety of free and premium templates, or use their own built-in designs. Once you’ve created your site, you’ll need to select an industry or topic. This will help you determine the features and capabilities that are important to your business.
You can start your free trial today to get started building your website with GoDaddy.
GoDaddy may make it for you using its ADI (Artificial Design Intelligence) to build a website for you, or you may make the site yourself.
GoDaddy’s site-builder is the simplest we have investigated, and it was ideal for total beginners.
GoDaddy’s plain design and simple features do not give you a high-quality or complex website. Instead, it’s a simple, speedy website that you can quickly get running in a few minutes. Check out the ratings below for more details!
Ease Of Use
Design Flexibility
Features
Help and Support
Value For Money
Customer Score
★★★★★
★★★★★
★★★★★
★★★★★
★★★★★
★★★★★
GoDaddy offers a one-month free trial, which means you can start building without spending a cent—the same cost as following along with the guidance in our book!
When you have completed setting up your site, we’ll take you through all the steps you need to make before publishing. We’re with you every step of the way, so let’s get rolling!
Which site type is right for you
Once you decide on the type of website you would like to build, you will have to determine which site type is best for you. If you will be selling online, you should select the online store option. If you wish to set up a website without accepting payments, then you should select the website creator choice.
You can bring an online store to your site if you wish to address a second audience. In this step-by-step guide, I ll be showing you how to build a website rather than an online store; however, many of the steps are similar.
Start Your Free Trial Now!
GoDaddy has got a one-month free trial. It’s a terrific opportunity to carefully implement the steps outlined, so you can get your site ready for when a free account comes to an end.
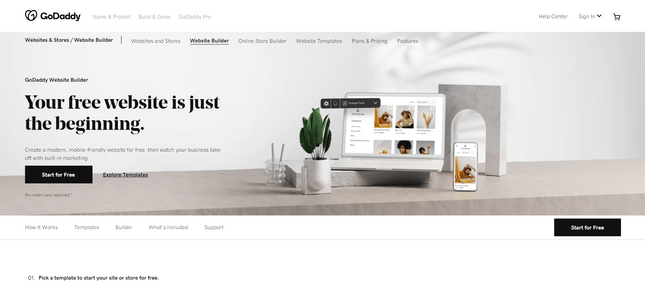
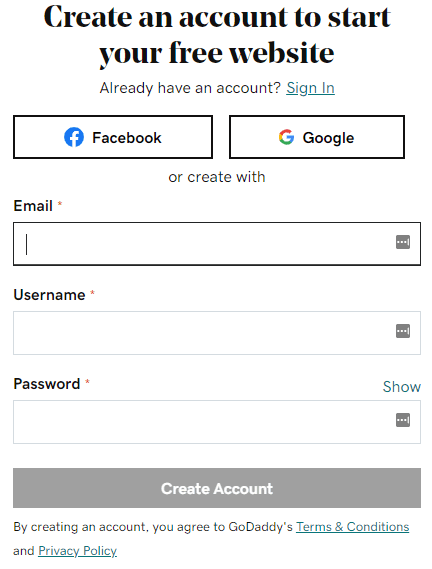
Hovering over the Start for Free buttons on the website of GoDaddy will allow you to click at no cost to open a GoDaddy account. It’s easy to practice with your free trial, all you need to do is click any of the Start for Free buttons present on the site of GoDaddy, create an account. It’s totally free, and you do not need to make any personal information prior to account creation.
All you need is an email address and a password, and you’re all set!
GoDaddy’s free trial is extremely free, and it gives you plenty of time to determine whether this is the right builder for you. There’s no risk and no obligation to sign up when the trial finishes; you only pay if you were pleased with GoDaddy!
There are four price plans to pick from, with a range of $9.99 and $24.99 per month (when billed annually). The cheapest plan is the Basic, which gives you all the standard features, including SSL encryption and limited access to social networks.
You will need the $14.99 per month Standard plan for SEO tools, and the $19.99 per month Premium plan for accepting bookings and payments for services or appointments.
The cheapest Ecommerce plan costs $24.99 per month, and includes the sale tools of discounts, shipping, and inventory management. Right now, in the free-to-start pilot state, you can begin active purchasing right away and come back to choose your active plan when you’re finished.
Create an Online Business that Reflects Who You Are
If you choose to register, this page will appear in front of you, asking you to begin. At this point, your page is set up, which could not be easier.

You just need to enter the industry that your site falls under, and then choose the site’s name from GoDaddy. As you do so, GoDaddy will automatically create an example page based around the information you entered.
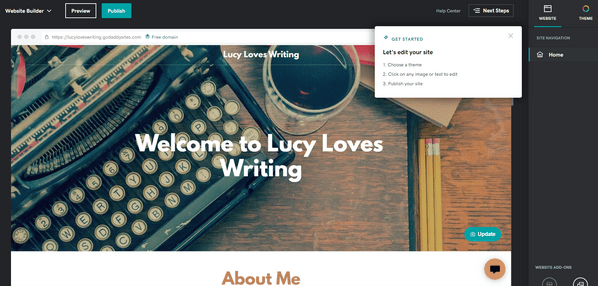
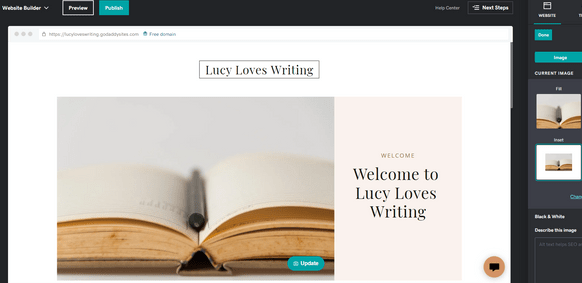
We desired a website under the category Writer, called Lucy Loves Writing. GoDaddy delivered us a simple, stylish template that closely reflected what we had advised it thus far. You can create different site titles and industry types until you find one you prefer, just press the Continue button.
Don’t worry if you don’t really like every single part of this website: You can quickly customize it to your liking using GoDaddy’s Websites Marketing tools.
Introducing Start Editing Your Site: Your Theme, Now Available!
You can now start to modify your base template to fit seamlessly into your own brand, because your first job is to pick your theme. The theme you choose will set the layout and design of your site, so it’s crucial to pick one you like!
Simply click on the Theme button, and a list of all the available themes will pop up.
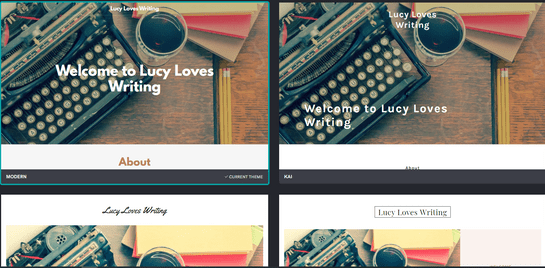
Nevertheless, the fundamental concepts of each theme remain the same, but layouts and styles will vary from theme to theme.
The final version of the site is still a work in progress, so don’t worry if it’s not perfect; add images, text, and pages to customize your website before it’s published. Just keep in mind that your theme isn’t set in stone, and GoDaddy allows you to go back and change your site’s theme whenever it suits you.
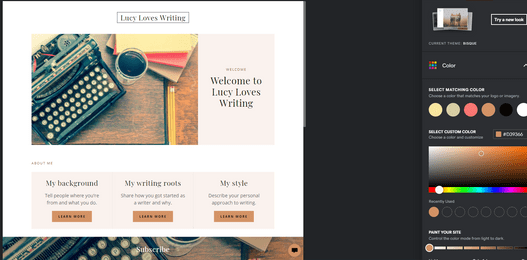
Personalized Photos For Custom Graphics (Image)
New website images can make your website much more successful, since stock photo images come filled with your site s theme by default. Though your theme comes with images added already, you may want to add images yourself! To do so, simply click the button to the right of the image within the edit screen.
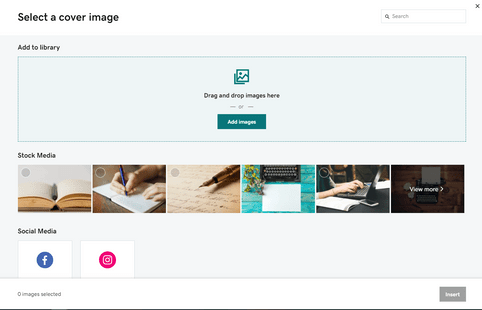
Here, you can upload your own digital photographs, access free digital images, or post images to social media by means of predefined buttons.
With the search function, it makes more sense to use the free stock images. Once you’ve selected your images, click Insert to see them appear on your website.
Below the image box where you can type in alt text, notice how your alt text appears when you hover over the picture.
Add Your Own Text
This crucial phase is crucial to the successful customization of your website. It goes without saying that your main web page should be brimming with engaging content.
You can edit the text on your page but is limited in terms of moving or even adding text boxes. You can’t just click and drag text boxes around, and you can’t add one text box. Instead, you need to add a new section (which is coming up next) and change the text that it comes with.
Add New Sections
Your website already has several sections: header, about us, contact us, and footer. You can encourage more visitors to your site by adding new sections with this tool, which can help you add a photo gallery, blogs, videos, menus, etc.
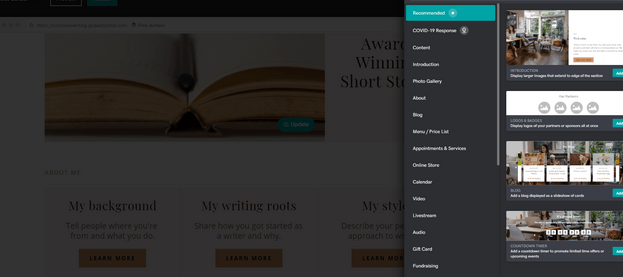
When you re editing your page, you ll notice blue► buttons appearing with ► signs on them . Hover over one of these, at which point the words Add ► Section will appear. Click this button, then choose what type of section you d like to add from the long list that pops up:
You can add up to 20 sections on each page, which is plenty. The only sections you can t add are more headers or footers, but excluding this, you are free to select whatever you like from that extensive list. If you are interested in adding as much new content as possible, it’s a good idea to insert a Content section, since you can write as much text as you would like!
Add or remove sections by clicking on them in the view list, then select the red Delete button at the bottom of the sidebar which appears on the right.
Add Pages
Website builders allow you to work with one-page websites or develop elaborate websites with hundreds of pages. How does GoDaddy work in this respect? Well, GoDaddy sits comfortably by these extremes: You can add as many as 50 pages to your site, or stick with a single page.
Simply click the Add more pages button on your Main menu, then see your current web pages in the upper right corner of the page.
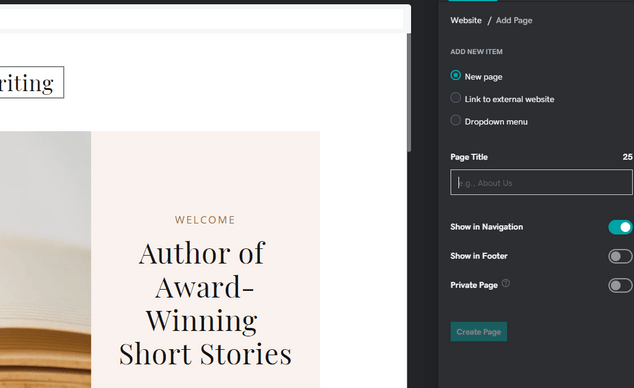
All you need to do now is give your new page a title, select the settings you want, such as if it is visible in the drop-down menu and click Create Page.
If you create a brand-new web page, you can start filling it up with content as usual after it has been created. Adding videos, contact forms, or customized code to those pages is simple since it has a clean appearance that’s ready for you to play with.
Site Settings
All of a sudden, entering Site Settings in the home menu will give you access to an array of features to add and modify. We will focus on four of the key things you may want to manage.
Your GoDaddy Site Profile page is where you’ll find the basic information about your site, including your email address, primary postal address, and domain address. GoDaddy uses the same email you used when signing up to create your GoDaddy Site Profile. You may optionally select a different email address, if you prefer.
You can select a different category for your business or insert a telephone number or address. This will cause customers to trust you and your business more once you are building an e-commerce website.
SEO is the process of being found online through website optimization. You can optimize your website to look great and be optimal under the scrutiny of search engines like Google, and there are many techniques, but GoDaddy makes the process simple with one simple tool.
Go to the SEO tab within your settings you may be selecting, and click Start Optimizing . This will take you to a new page, where you can go through the GoDaddy SEO Wizard. Here, you can answer questions such as whether your audience is international or local, describe what your site is about, and choose keywords from the TAG suggestions.
GoDaddy makes it simple for anyone to optimize their web site, without needing to pick up on any of the technical particulars. It’s not your most state-of-the-art search engine marketing tool, but for beginners, it is fine.
your site’s hard work must not be diminished if you want to take it to the next level, in which case Google Analytics is an essential tool. It provides you with crystal clear insights into your internet site’s traffic, interactions, and general performance, which can help you improve your site for those hoping to take it to the next level.
First of all, go to the menu list labeled “Analytics” on your Settings tab, and then go to “Google Analytics” in the menu. If you sign up to Google Analytics, you’ll be given their Tracking ID if you have a copy, and then all you must do is enter it into the “Analytics” field on your settings tab, and let GoDaddy handle this.
It is a well-known trend that pop-ups are forced to ask for user information and give the user the best user experience and set up the cookies. It’s probably the case that you let them close without going through the verification process.
When you are creating your own website but you’re rebuilding it from the ground up, you have to give thought to cookie rules . GoDaddy provides you a default cookie message that is suitable pertains to usual sites. Make certain you enable this in your settings prior to releasing your site securely, otherwise it will not show up to users.
Based on the type of site you’re running, or the industry your business sits in, you may need to edit this to become a more descriptive and legally sound message. If you have a longer and very detailed policy, you can also add a privacy policy to your site by adding a new section to your page, and choosing the Privacy option.
Advanced
To bring your website to a higher level of professionalism, you might want to consider adding a couple of extra features.
Social Media to Your Site
Keep caring for your customers by integrating social media with your website. You can add buttons linking to your social media accounts, making it easy for visitors and customers to find you and follow your accounts. You should simply add a new section and select Social Media in the Add Widget menu. Next, simply insert the respective social media profile links into the relevant boxes.
Online Appointments
GoDaddy eCommerce and Business Plus users can modify the appointment section of their site. This is why click Add Section, then Appointments & Services.
You’ll enter data and price points for online bookings in the dashboard of your internet site, but GoDaddy will help guide you through the process. You’ll receive excellent bookings by choosing this option that permits clients to book appointments and services directly from your property site.
Connect a Custom Domain
Once you’ve finished developing your site, the last step is to connect the domain. If you already own a domain, you can connect it to Squarespace; otherwise, you can purchase a domain name from GoDaddy.
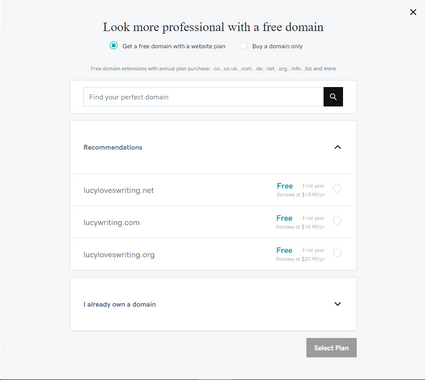
GoDaddy can provide recommendations for a new domain based on the name of your website or you can find one yourself. We’ll need to pay for this domain, but it’s not going to be expensive—the ones we looked at cost $11.99 per year.
Preview and Publish Your Site
You re prepared to display your website to the community. To avoid any surprises, click here to verify that your site looks the way you’d like before pressing the Publish button. Get somebody else to look over your completed website as an alternative test run and to make sure it’s as desired.
Keep an eye out for broken links, images that failed load, or material you intended to delete but for some reason left off. Once you have successfully completed your site, it is possible to click on the Publish button with confidence.
Promote Your Website
Make sure that you post your awesome website so others can learn about it. Now’s the opportunity to use professional email marketing services through GoDaddy ‘s Digital Marketing Suite, and link to your visitors.
Add a Subscribe box to your website to encourage people to sign up for your mailing list, where you can modify the layout as well as the contents of its message to make it really stand out.
If you subscribe to either the Business Plus or eCommerce plans, you can list your business on Google. This increases your site’s visibility, as Google Search users will easily find your business according to your hours, address, and contact information.
Final Thoughts
In conclusion, there are many great things about using Godaddy for hosting your website. First and foremost, their customer service is always available to help if something goes wrong. Additionally, their platform is very user-friendly, which makes creating and managing your website a breeze. Lastly, they offer a wide range of hosting options to fit any budget. So whether you’re starting out or looking to increase your website’s visibility, hosting with Godaddy is a great option in 2023.
Related Posts: