
GitHub is a popular code hosting and version control system. It’s easy to set up and use, making it a great option for hosting your website. In this article, we talk about How to host website on GitHub. This guide will show you how to set up a website on GitHub, using the free account. Hosting your own website can be a challenge, but with GitHub, it’s easier than ever. This tutorial will show you how to host a website on Github using only the command line interface.
Create repository
To create a new repository, follow these steps:
- In the GitHub desktop app, select New > Repository.
- On the command line, run `git init` with no arguments.
In the GitHub desktop app, select New > Repository. On the command line, run `git init` with no arguments
How to host a website on GitHub
- Create a repository.
- Create a GitHub account.
- Download and install the GitHub Desktop app.
- Create a new GitHub project by clicking “New Repository” in your web browser, or using the command line tool `git init` if you’re familiar with Git commands (more on that later).
- Copy your files into that new folder as well as any other necessary assets like images or stylesheets–you can also use existing files from another project if they match what you want for this one!
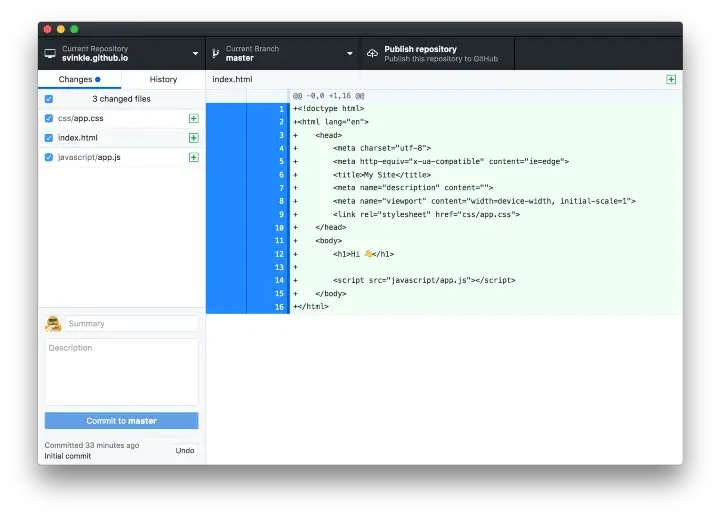
When everything looks good on your computer screen, it’s time to publish!
This can be done by clicking the “Publish” button on the GitHub Desktop app. It will ask for your username and password, and then after a few moments you’ll see something like this:
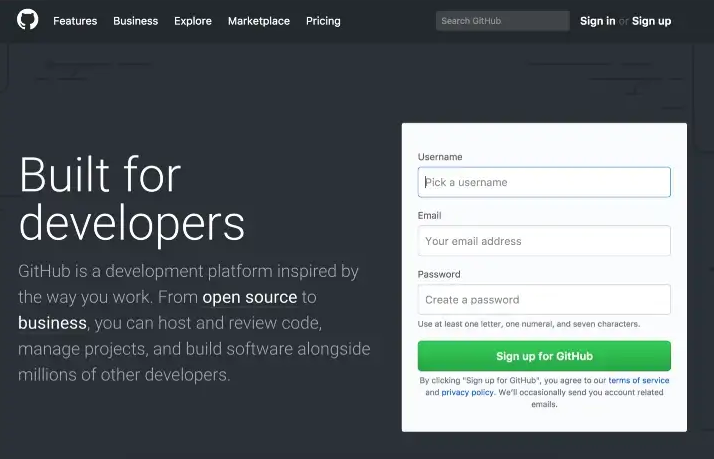
Create a GitHub account
To get started, you’ll need to create a GitHub account. To do so, click on the “Sign up” button in the top right corner of your screen and enter your email address and choose a password. Once done, click on “Sign up for GitHub.”
You’ll be taken through some steps where you can add additional information about yourself as well as select which projects you’d like to contribute to before finally clicking on “Create Profile.”
Once you’ve created your account, you’ll be taken to the GitHub homepage. Here, click on the “Sign in” button in the top right corner of your screen and enter your username and password. Once done, click on “Sign in” to get started!
Download and install the GitHub Desktop app
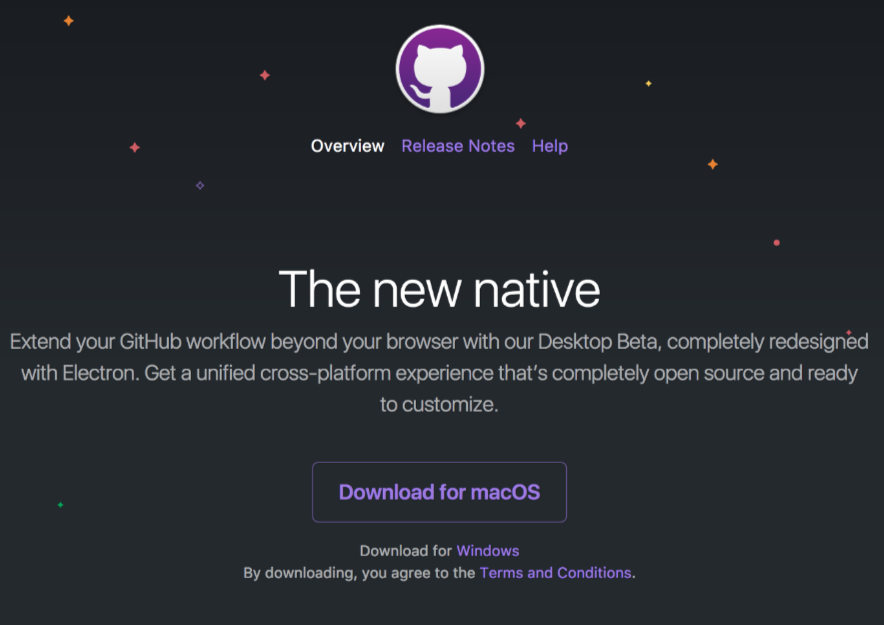
Before you can host your website on GitHub, you’ll need to download and install the GitHub Desktop app. To do this, open your browser and navigate to https://desktop.github.com/.
Once there, click “Download for Mac” or “Download for Windows” depending on whether or not you use a Mac or PC (if in doubt, check with someone who does). Then follow the steps for installing applications on your computer: double-click on the downloaded file; drag it into Applications; enter administrative credentials if requested; wait for the installation to complete; open up Finder again–and voila! You now have access from within Finder itself by simply clicking Applications > GitHub Desktop@2>GitHub @ 2>.
If you’re using a Mac with the latest version of Safari, you can also install GitHub Desktop by clicking here and following the prompts.
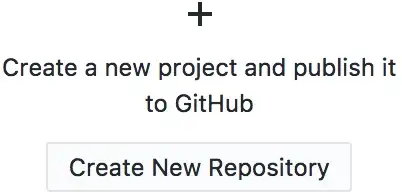
Once you have the app installed, open it up and sign in to your GitHub account. Then click on “New Repository” at the top of the window. You’ll be prompted to name your repository (something that makes sense as well as being easily identifiable), as well as select a folder to store it in.
Create a new GitHub project
First, we must make on GitHub GitHub Desktop aware of our project files. We do this by creating a new Repository folder, then copying our website files to that folder.
Click the Create New Repository button in GitHub Desktop to open the application.
When you wish to create a new repository, enter the Name text as:
It helps to name your repository in this way; this will tell GitHub to host the files in the project automatically and display them if someone points their browser to it.
https:// [username] .github.io
The URL for your site will be listed here when it is ready to be published and go live!
The Path text input is where your repository will live on your computer; this is not where your website files currently reside in your computer’s hard drive. GitHub Desktop should create a new, empty directory.
In the future, we’ll need to be putting the files copied over in an area of your choosing, but for the time being, copy them to some folder such as Sites in your Home directory. This will create a new folder within the Sites folder with the name of your repository, which may read like:
http://sites/ 20[username]. 20github.io
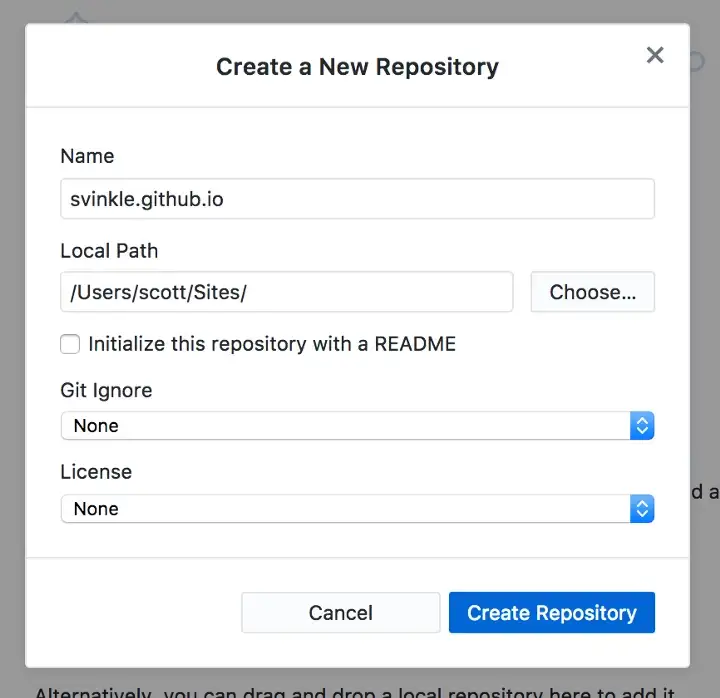
Open all other checkboxes and leave these at their standard settings then click the Create Repository button. For now, just create the GitHub Repository folder that GitHub Desktop can recognize as a folder it can work with. For the sake of this guide, we’ll call this new folder your GitHub Repository folder.
Copy your files to the new Repository folder
To copy your files, click on the “new folder” icon in the upper left-hand corner of your screen. In the box that appears, type in the name you want for your new repository and press enter.
Next, navigate to where your website’s files are stored (this may be inside a parent folder). Right-click on any file or folder inside this parent folder and select “Copy” from the menu that pops up. Then go back to GitHub’s interface and click on its new repository directory; now drag-and-drop those copied items into it so they appear under their appropriate subfolders within this new directory structure–you’ll see them listed there as soon as you do so!
When you’re done, click on the “new file” icon and create a new text document called README.md (with no extension). This is the file that will tell others what they need to know about your repository when they come across it on GitHub’s website–it should have information about how to use your files as well as any important notes about them. When you’re finished with this step, press enters twice so that a blank line appears between the last item in your README file and its first line of text.
Publish your website
Now that your website is ready to go, it’s time to publish it. You can use GitHub Pages to host your site. This means that you don’t have to worry about setting up and maintaining your own server–you just need a free GitHub account and a few minutes of time.
Once you’ve created a new repository for this site in the previous step, now we’ll add all of our files to it:
- Click on “New File” in the sidebar on the right side of GitHub.
- Choose “Markdown (.md)” as the file type when prompted by clicking “Create New File”. This will create two text files called index.md (which contains all of our HTML) and readme.md (which contains our markdown). We’ll work with these later!
Share your website!
GitHub Pages is a service that allows you to host a static website for free. You can use it to host your own blog, or you can use it to showcase your projects.
It’s really easy: just push your files into the gh-pages branch of any repository on GitHub, and they will automatically be served at https://username.github.com/repo-name/. If you have an existing repo on GitHub that isn’t being used for anything else (or if this will be your first time using GitHub), then go ahead and create one now!
We’ll be using this repo to host our blog. You can go ahead and create a new repository or use an existing one that’s already in your account. If you don’t have any reports yet, then go ahead and create one now!
Commit to repository
To commit to the repository, you will need to set up your GitHub settings. If you already have an account with GitHub, then this should be easy for you. However if not, follow these steps:
- Create an account at [https://github.com/](https://github.com/). You can do so by signing up with Facebook or email address (if neither of those is available for whatever reason) and filling out all required fields including password strength requirements, which should be at least 8 characters long with 1 number or special character (examples include @#$%&*()_+{}[]^!,?/)
- Once logged in click on Settings on top right corner of screen under “Your Account” header
GitHub settings
- How to change your GitHub settings.
- How to change your username on GitHub.
- How to change your password on GitHub.
- How to delete your account on GitHub.
- How to change your email address on GitHub.
- How to change the name associated with your account on GitHub.
Conclusion
I hope this article has been helpful in getting your website up and running. If you run into any problems or have any questions, feel free to leave me a comment below. And if you have any other tips for setting up GitHub pages, please share them with us!
Related Posts: